Thursday, October 10, 2013

Chalkboard side cupboard

Notice the little hands that like to help. 
      I finally got around to putting a chalkboard canvas with some cool wooden rope trim up on the end side of my kitchen cupboards last week. 

Today I decided to add a little fall decor to it.
Ta Daaaa
Posted by Picasa

Waiting for the school bus


Waiting for the school bus this morning was picturesque.  I couldn't help but take the camera out with us and get some shots of the kidlits (and Shamrock)waiting.


Posted by Picasa

Tuesday, October 8, 2013

Fall coloured mason jars

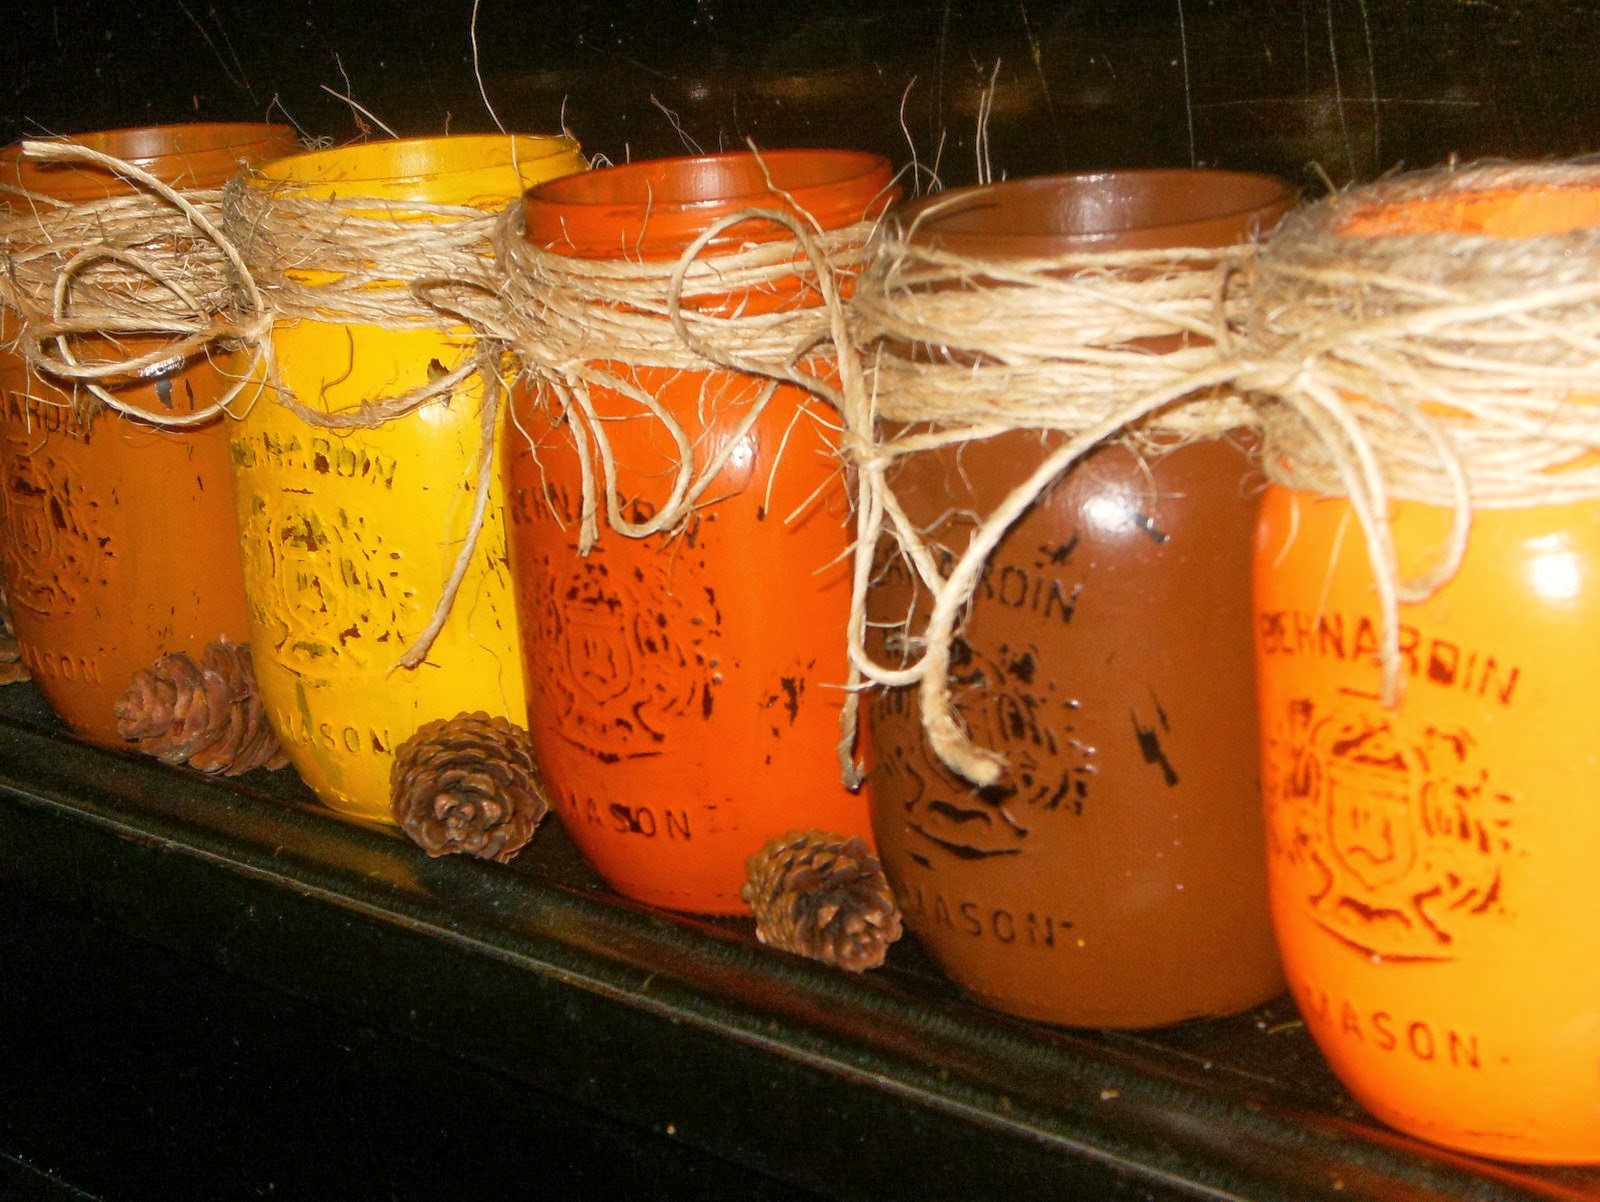
      I often see a great deal of different uses for mason jars whilst surfing Pinterest and since I love painting so much I thought I'd give this little craft a try. 

We are in the midst of some gorgeous autumn weather here, so I was of course influenced by the beautiful fall colours.

I had a bunch of left over different size mason jars on hand from some previous artsy crafts I made so I was go to go with those.

I picked up about 5 of those inexpensive little paint colours from a couple of different local stores each bottle only costing about $2.00. But wow, are there a lot of colours to choose from!
  • Using some of my kids paint brushes and some I picked up at the dollar store, I gave each bottle a few coats of paint letting them dry for about an hour between coats.

  • Then thoroughly let them dry for several hours or even better overnight before sanding down the words and pictures on the glass as well as a few spots here in there to give them a somewhat aged look.

  • I used 100 grit sandpaper, but could have even used an emery board.

  • Then I slapped on a  couple coats of  Modpodge in a matte finish.  Letting it dry about 20 - 30 mins. between coats.

  • Lastly I wrapped several layers of twine around the top.

So easy peasy and fun they were, that I have now started working on some Christmas colours.
Posted by Picasa

Saturday, September 7, 2013

DRIFTWOOD LAMP

I saw a similar lamp in a magazine once whilst at mother in laws for a visit.  It was the exact same IKEA lamp I already had so I was immediately inspired to make one myself.

BEFORE     &    AFTER
First I spray painted the metal base white.
Then I went to my bag of driftwood odds & ends and glue gunned them on, which was a little tricky  getting the placement just right.
After that I gave the branches a whitewash of paint a couple of times.
Then decided the lampshade needed a bit of rustic flair so I glued on some rope.
And voila!

I'm still not really sure how I feel about it as I think the one in the magazine looks nicer, but anyhoodles, I gave it shot.


HOME MADE ART


I had these three Ikea art frames with prints in it, but the prints were too small and never looked right.  So I got some inspiration to make some new artwork from a few sprigs of nature, some white bristol board, a can of low tac spray adhesive and a can of spray paint for Home Hardware.


1) Find some natural inspiration - I used ferns, tall grass & a pine tree branch.
2) Cut the bristal board to the size of the frame
3) Centre that matt board on the bristal board and lightly trace the inside with a pencil then remove matt.
4) Spray the back side of the fern (for example) and stick it lightly to the bristol board so it doesn't fly off when your spray painting it.
5) Centre the fern & arrange it in the inside square of the matte to your liking and then spray paint lightly to get the outline.
6) After drying put the matt board and print back into frame. 
Stand back, look and be proud of your artwork.

And voila... kind neat wouldn't ya say?...or maybe nay?

Question for ya'll:  See those lamps there?  Would you spray paint the bases a kind of wrought iron black colour or leave them as is?


FROM TABLE CLOTH TO CURTAINS

You just never know.

I LOVE this table cloth I found at Winners but when I put it on the table it just was't getting the ewww & ahhhh factor that it so deserved.  So, I decided perhaps it might look better hanging as curtains  - and that it did!  Although you can't really tell from this photo.


Friday, July 19, 2013

OLD RATTAN ROCKER ROCKS!!

GREAT CURBSIDE FIND...


BEFORE


AFTER


 Kieran and I were out for a walk one day and discovered this old rattan rocker on the next street over laid out by the road side headed for you know where.  At first we left it there and went home but then like a dog with bone I couldn't let it go and just had to go back get it. 


So back Kieran and I went and awkwardly,  lugged it home.
I hand sanded  down all the chipped varnish and rough spots then got out a can of (well a few cans) Rust-oleum's Painters Touch Ultra Cover 2x in Satin Heirloom White.
Then added the cushion, which is actually from our chaise lounger just folder under at the end. 
TA DA - It works perfectly and looks lovely!


Saturday, January 26, 2013

WASAGA BEACH SUMMERS


The end of January always seems like a good time to think of the warm summer to come which also leads me to reminisce of some of the best parts of summers gone by...